
Using „HyperBackup“ to create Backups is the best and easiest way to save all your data and settings on your Synology. Finding a target to backup is not that easy. You can buy an other Synology Produkt or set up an Linux Server. My Solution is a Raspberry Pi with Raspbian / Raspberry Pi OS and an external USB Drive attached. Installing and mounting the USB drive has to be done before you can use this help to install the RSYNC-Server.
Mount your external device and make sure that it will be always mounted automatically after restarts.
In our example we use the path /mnt/USBDevice
First you have to install the rsync service, use following command:
sudo apt-get install rsyncAfter the successful installation you can change following config file.
/etc/default/rsync
you can do this by typing
sudo nano /etc/default/rsyncand change following lines
*
RSYNC_ENABLE=false
*
RSYNC_CONFIG_FILE=
to
*
RSYNC_ENABLE=true
*
RSYNC_CONFIG_FILE=/etc/rsyncd.conf
now exit the nano editor with „Control +x“ and accept the changes with „Y“ (if you are using a mac)
Now you can create the rsyncd.conf file by following command:
sudo nano /etc/rsyncd.confcopy this content into the file and change the parameters to your settings
max connections = 2
log file = /var/log/rsync.log
timeout = 300
 [SYN-HyperBackup]
comment = This folder will be shared for rsync backups
path = /mnt/USBDevice
read only = no
list = yes
uid = root
gid = root # für PI
# gid = wheel # für macOS
auth users = syno
secrets file = /etc/rsyncd.secrets.syno
now we have to set the password for the user syno by typing
sudo nano /etc/rsyncd.secrets.synoand add following: (please do not forget to change the password)
syno:passwordexit the nano editor and change the user rights for the password file with following command:
sudo chmod 600 /etc/rsyncd.secrets.synoand add the user to the system
sudo adduser syno --system --group --no-create-home --shell /bin/falseRestart the rsync service to load the new config
sudo systemctl restart rsync.service Now you can login to your Synology and Download the HyperBackup in the Package Center and add a new Data Backup task
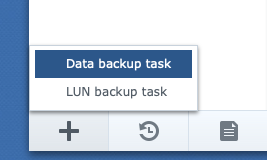
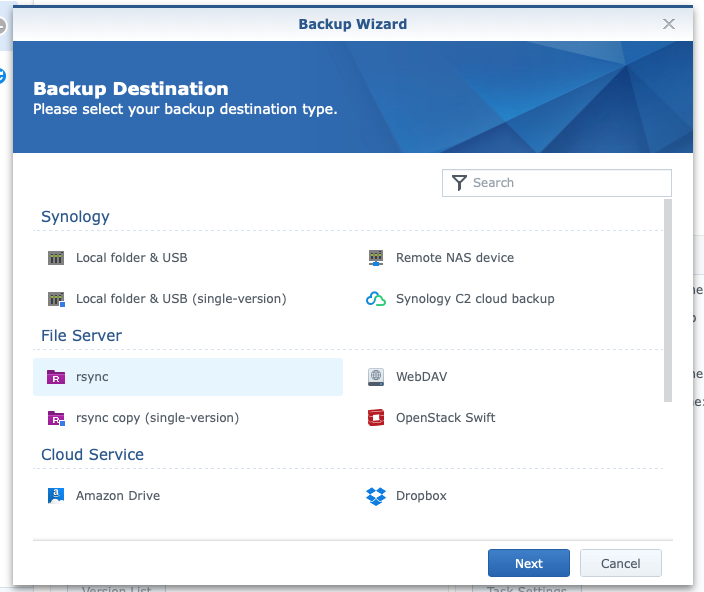
Choose „rsync“ as option an clock on Next
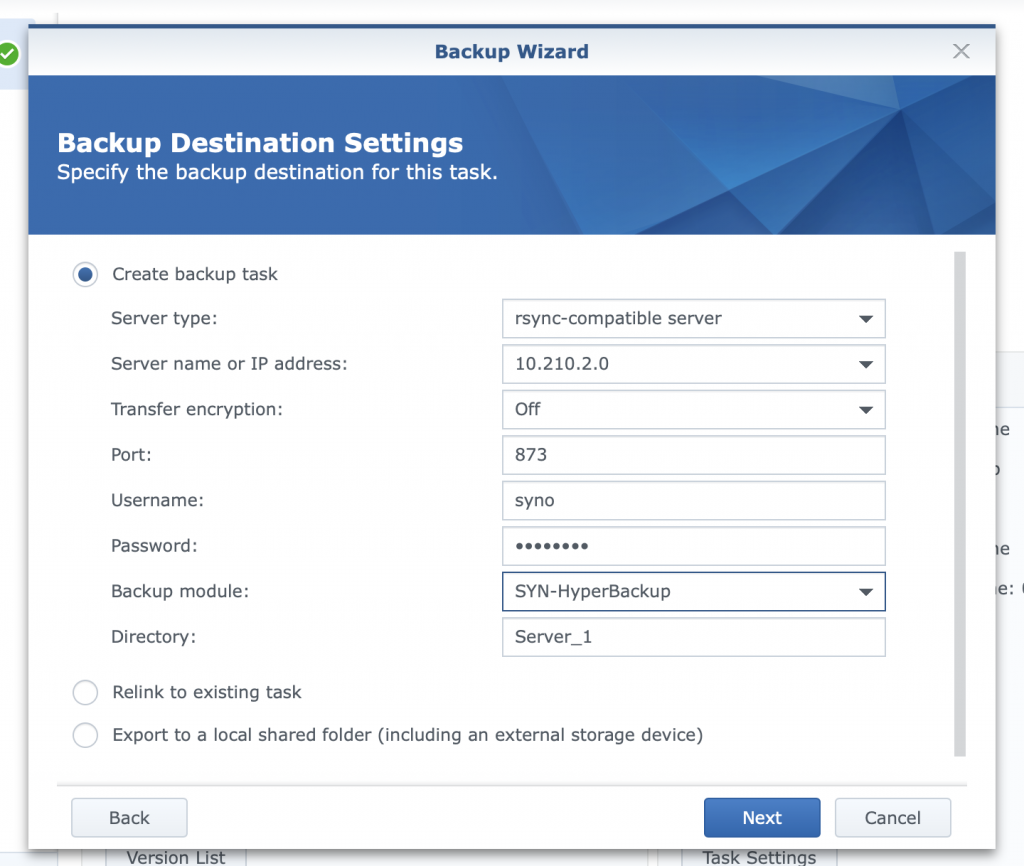
Now you can choose „rsync-compatible server“ add the IP address, user and password. When you click on the Backup Module you should get the same name you have set in the /etc/rsyncd.conf file. Follow the the next steps like you want to have it.
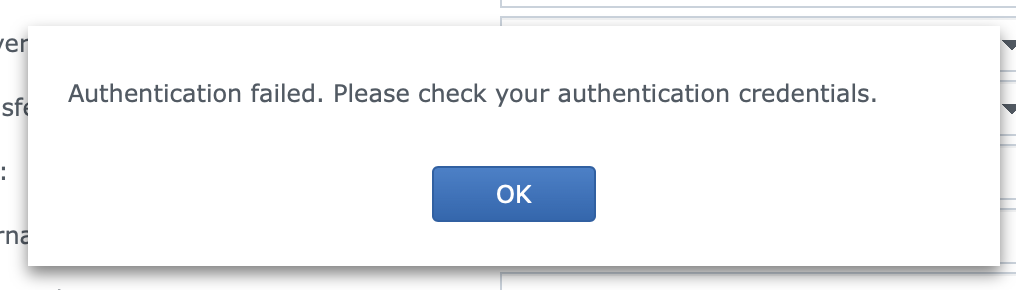
Typical Error Messages:
- „Authentication failed. Please check your authentication credentials“
Make sure that you have the right password and that you have created the same local user.
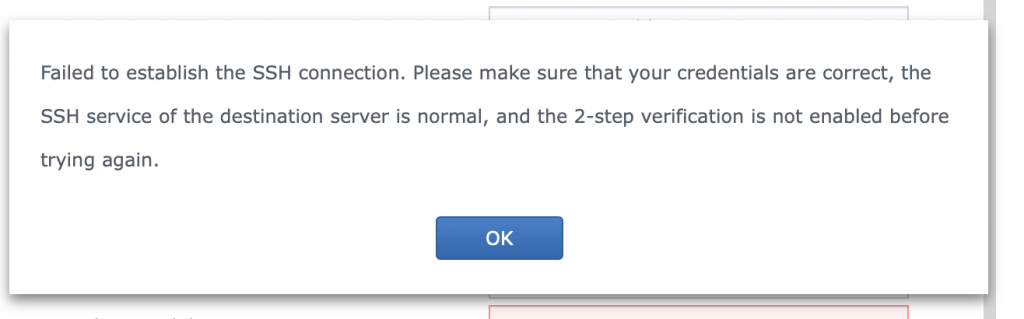
- Failed to establish the SSH connection. Please make sure that your credentials are correct, the SSH service of the destination server is normal, and the 2-step verfication is not enabled before trying again.
May you have the wrong Port. Make sure that you use 873.
Restoring files you can use follwing information
Restore Data from Synology Hyper Backup local
Thanks to following homepages helping me to create this manual:
Framp’s Linux Tips and Tricks
Synology-Forum.de
and thanks to following helpers:
Thomas Böhm (http://boehm.gl) for the Mac Version
If you want to backup to an Apple Device with you have to create a LaunchDaemon
/Library/LaunchDaemons/org.samba.rsync.plistwith following content
<!DOCTYPE plist PUBLIC "-//Apple//DTD PLIST 1.0//EN" "http://www.apple.com/DTDs/PropertyList-1.0.dtd">
<plist version="1.0">
<dict>
    <key>Disabled</key>
    <false/>
    <key>Label</key>
    <string>org.samba.rsync</string>
    <key>ProgramArguments</key>
    <array>
        <string>/usr/local/bin/rsync</string>
        <string>--daemon</string>
        <string>--no-detach</string>
    </array>
    <key>RunAtLoad</key>
    <true/>
    <key>KeepAlive</key>
    <dict>
        <key>SuccessfulExit</key>
        <false/>
    </dict>
</dict>
</plist>
the default path for you rsync should be
<string>/usr/local/bin/rsync</string>If not change it in the plist file to the correct one
now you can start the Deamon with
launchctl load /Library/LaunchDaemons/org.samba.rsync.plist
1 comment for “Synology – Backup to RaspberryPi”