If you want to install Zabbix direct on your Synology Docker Setup you can use following Step-by-Step help. You can short it if you use my Backup files and Import them. (You find the Step-by-Step and the files help attached at the end of this document)
Install Docker on your Synology.
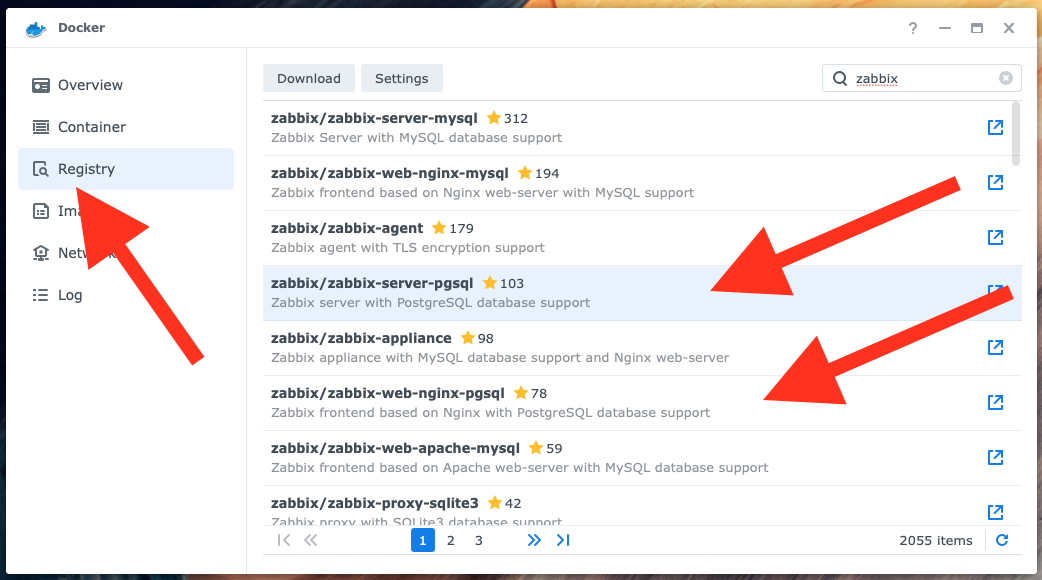
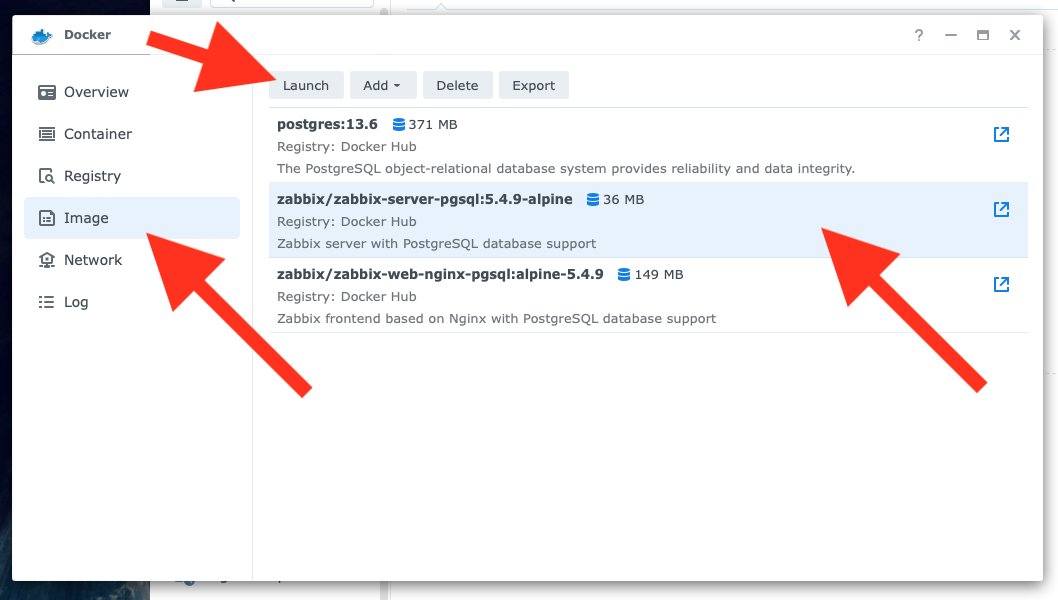
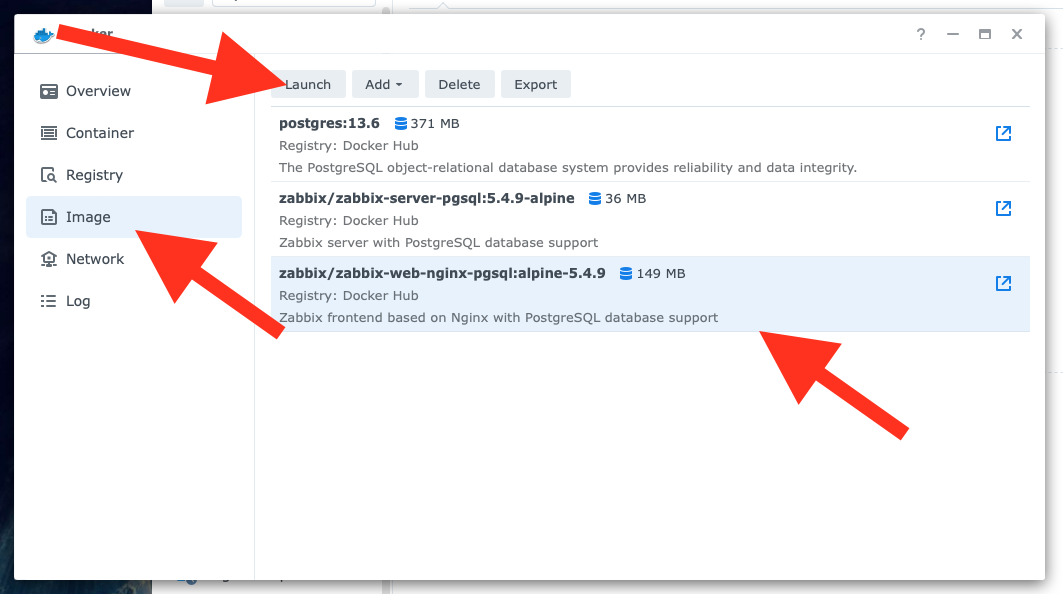
Download following images:
– Postgres in the version 13.6
– Zabbix / zabbix-web-nginx-pgsql / alpine-5.4.9
– Zabbix / zabbix-server-pgsql / alpine-5.4.9
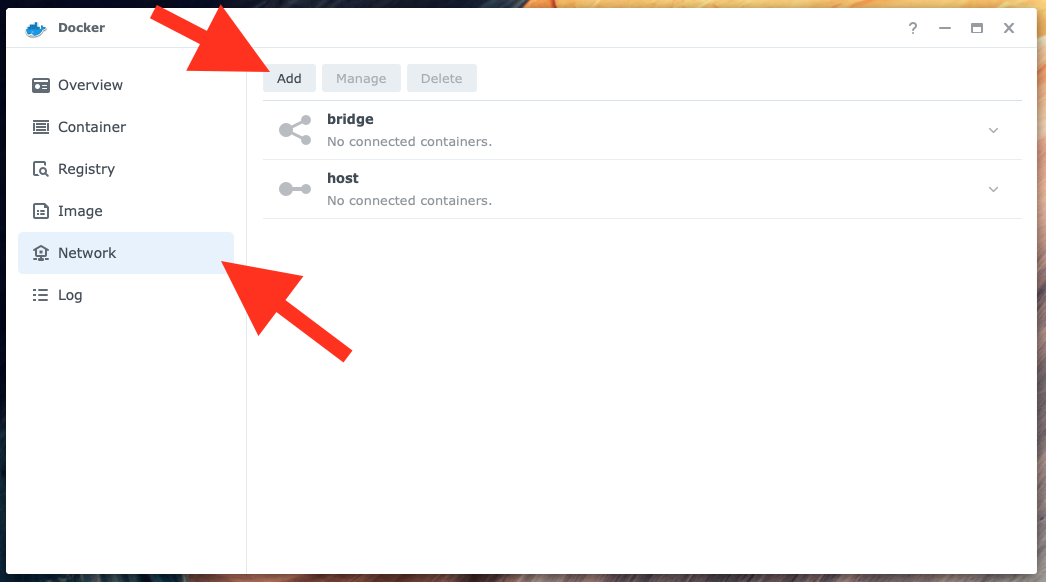
Configure Network
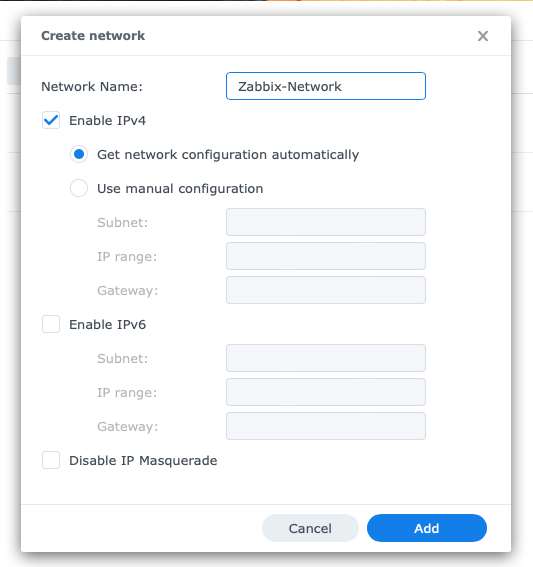
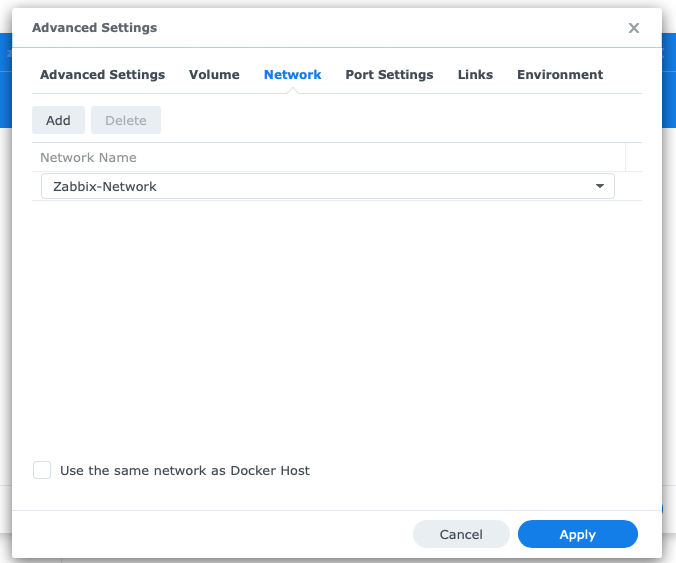
Create a new network with the name: Zabbix-Network
Launch and Configure Postgres 13.6
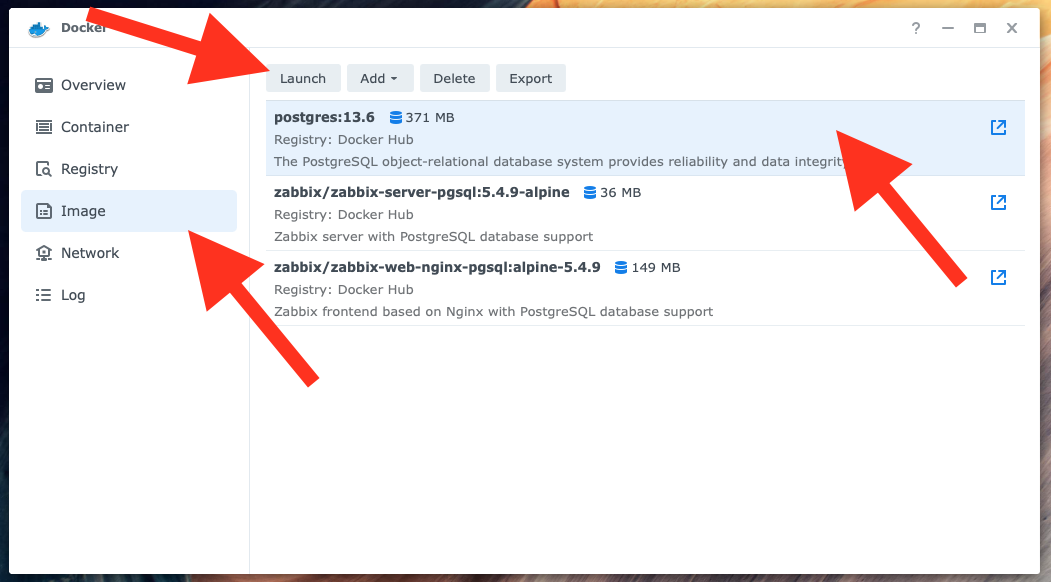
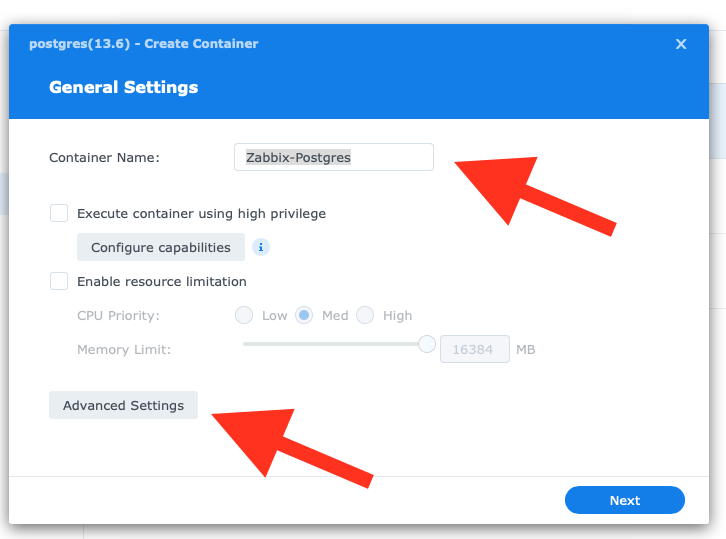
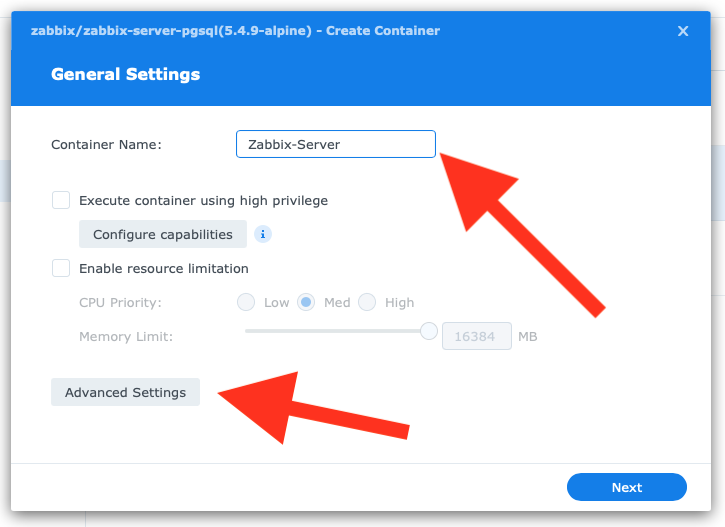
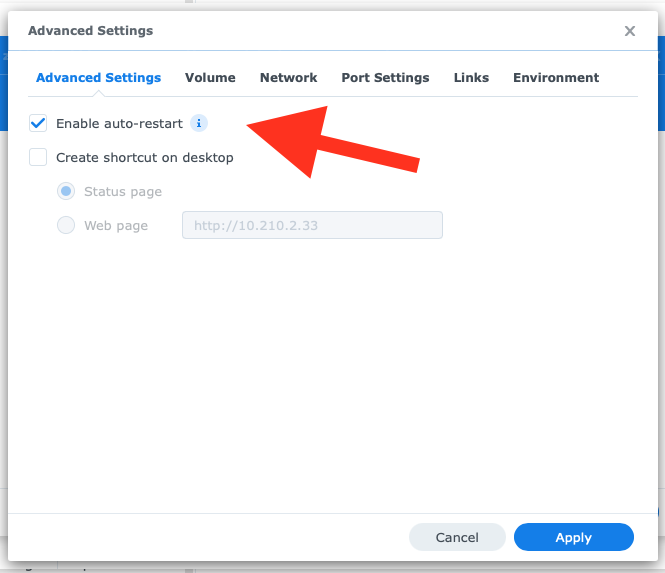
Set the container name to: Zabbix-Postgres and click on Advanced Settings
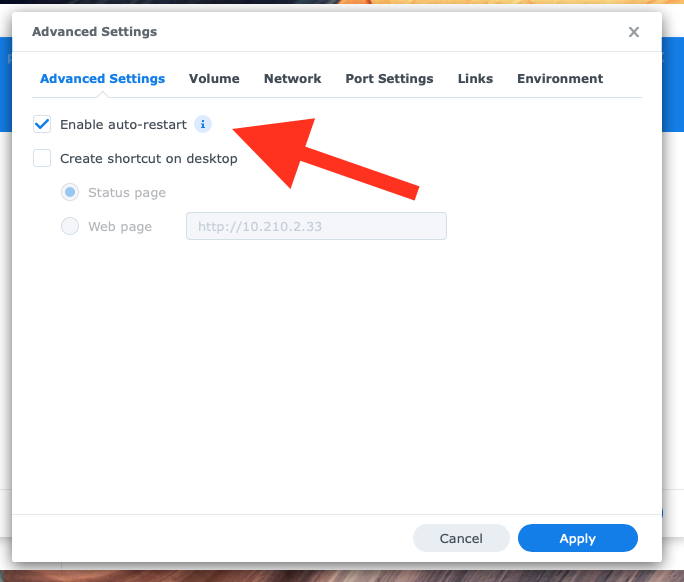
Enable auto-restart
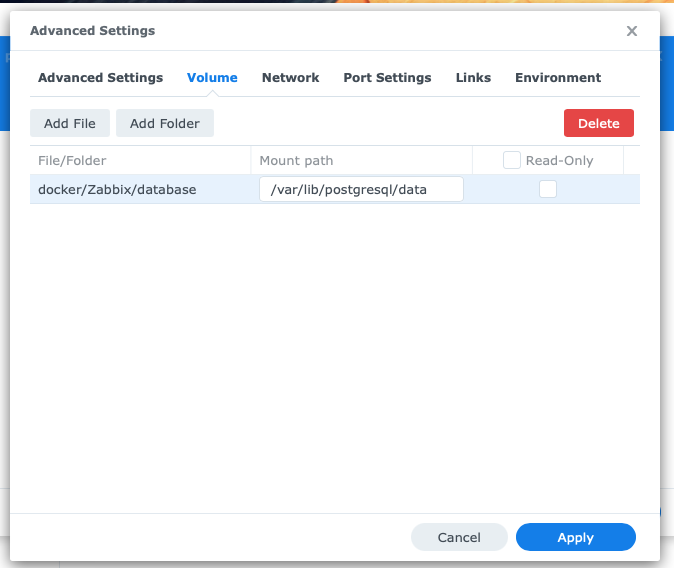
Add a folder to the mount path: /var/lib/postgresql/data
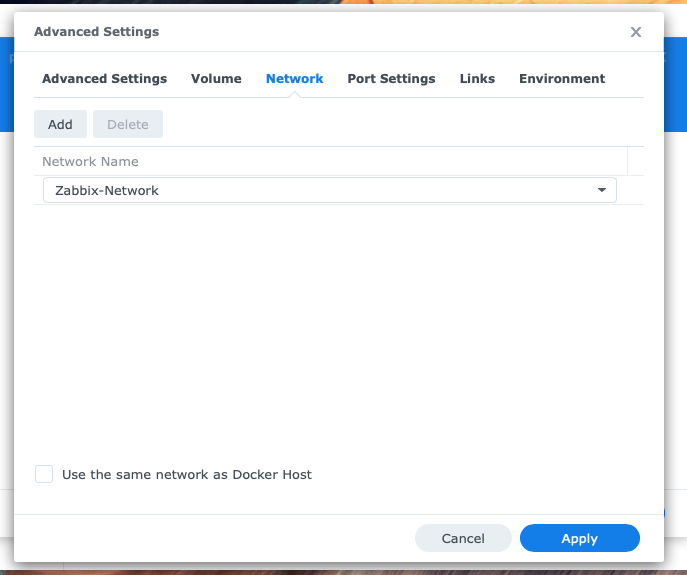
Add the Zabbix-Network to in the network settings and delete the bridge network
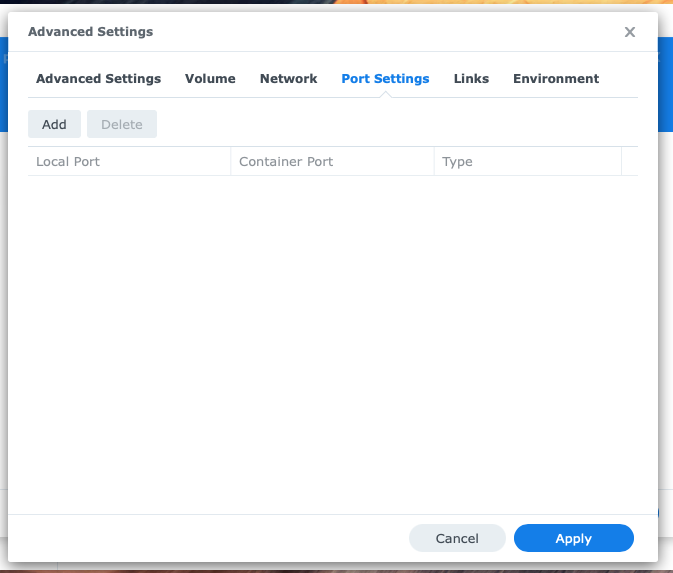
Delete the Port Setting
And now you can set following variable in the Environment settings.
POSTGRES_USER=zabbix
POSTGRES_PASSWORD=zabbix_pwd
POSTGRES_DB=zabbix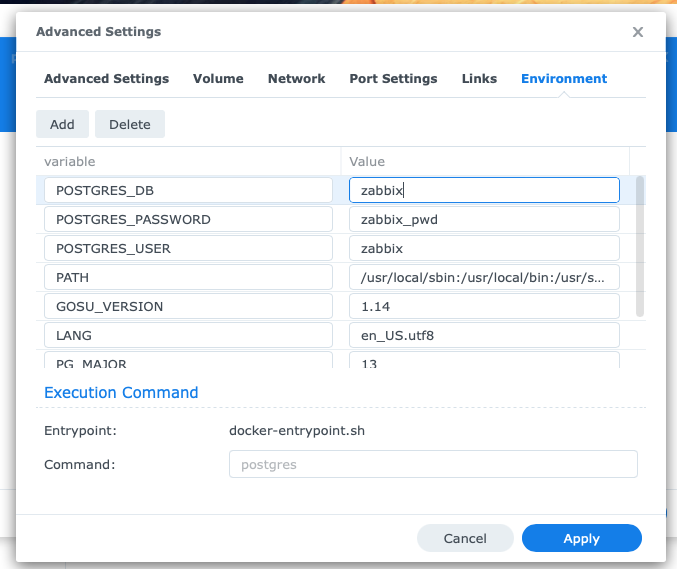
Now follow the next windows and start the container
Launch and Configure Zabbix Server
Set the name to Zabbix-Server and click on advanced settings.
Enable auto-restart
Add the Zabbix-Network to in the network settings and delete the bridge network
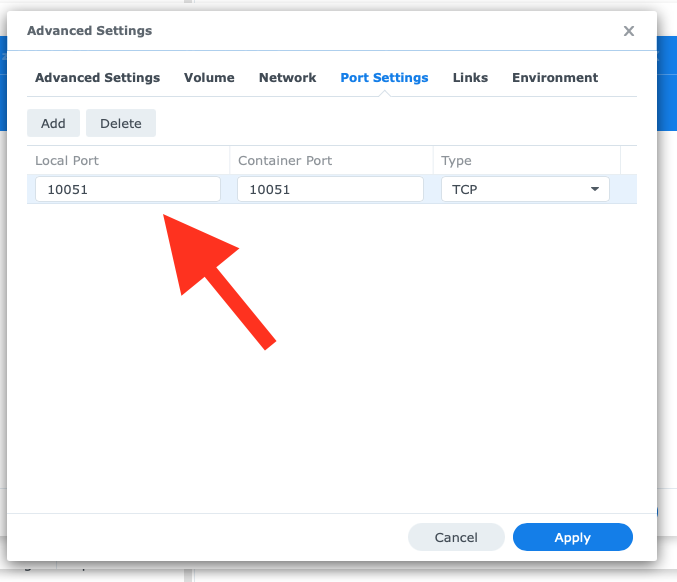
In Port Settings change AUTO to 10051
And now you can set following variable in the Environment settings.
DB_SERVER_HOST=Zabbix-Postgres
POSTGRES_USER=zabbix
POSTGRES_PASSWORD=zabbix_pwd
POSTGRES_DB=zabbix
Now follow the next windows and start the container
Launch and Configure Zabbix WebGUI
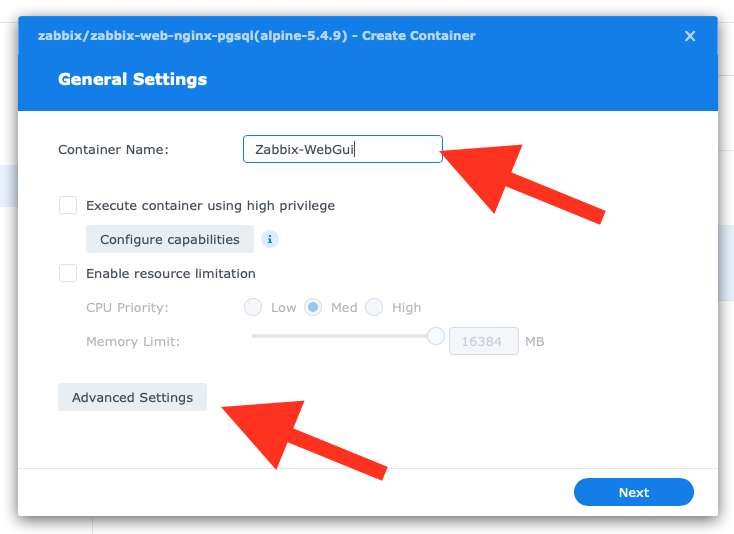
Set the container name to: Zabbix-WebGUI and click on Advanced Settings
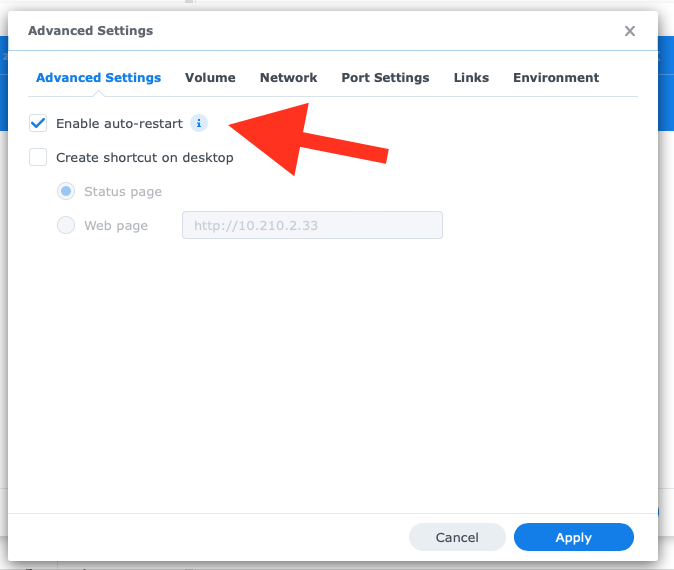
Enable auto-restart
Add the Zabbix-Network to in the Network Settings and delete the bridge Network
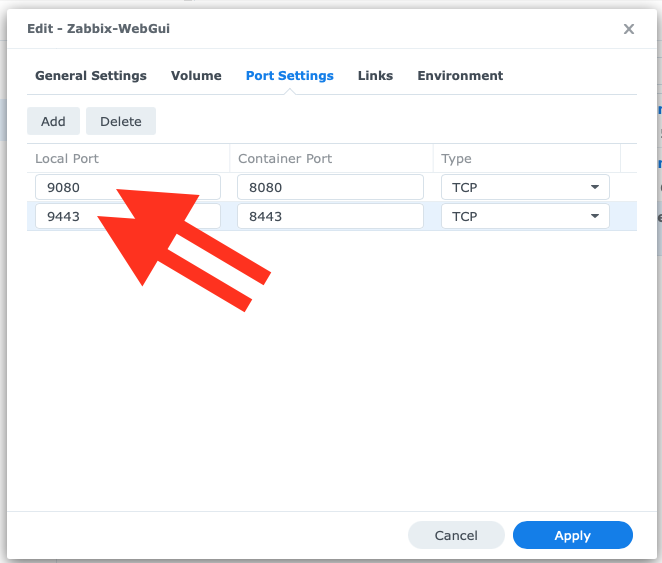
In Port Settings change AUTO to 9080 and 9443
And now you can set following variable in the Environment settings.
ZBX_SERVER_HOST=Zabbix-Server
DB_SERVER_HOST=Zabbix-Postgres
POSTGRES_USER=zabbix
POSTGRES_PASSWORD=zabbix_pwd
POSTGRES_DB=zabbix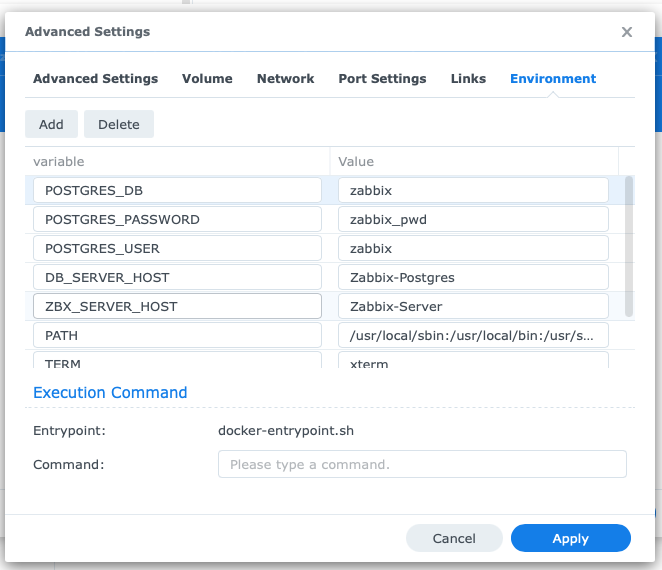
Now follow the next windows and start the container.
Now you should be possible to login via your IP-Adress:9080 with the User Admin and the password zabbix
Configure Network
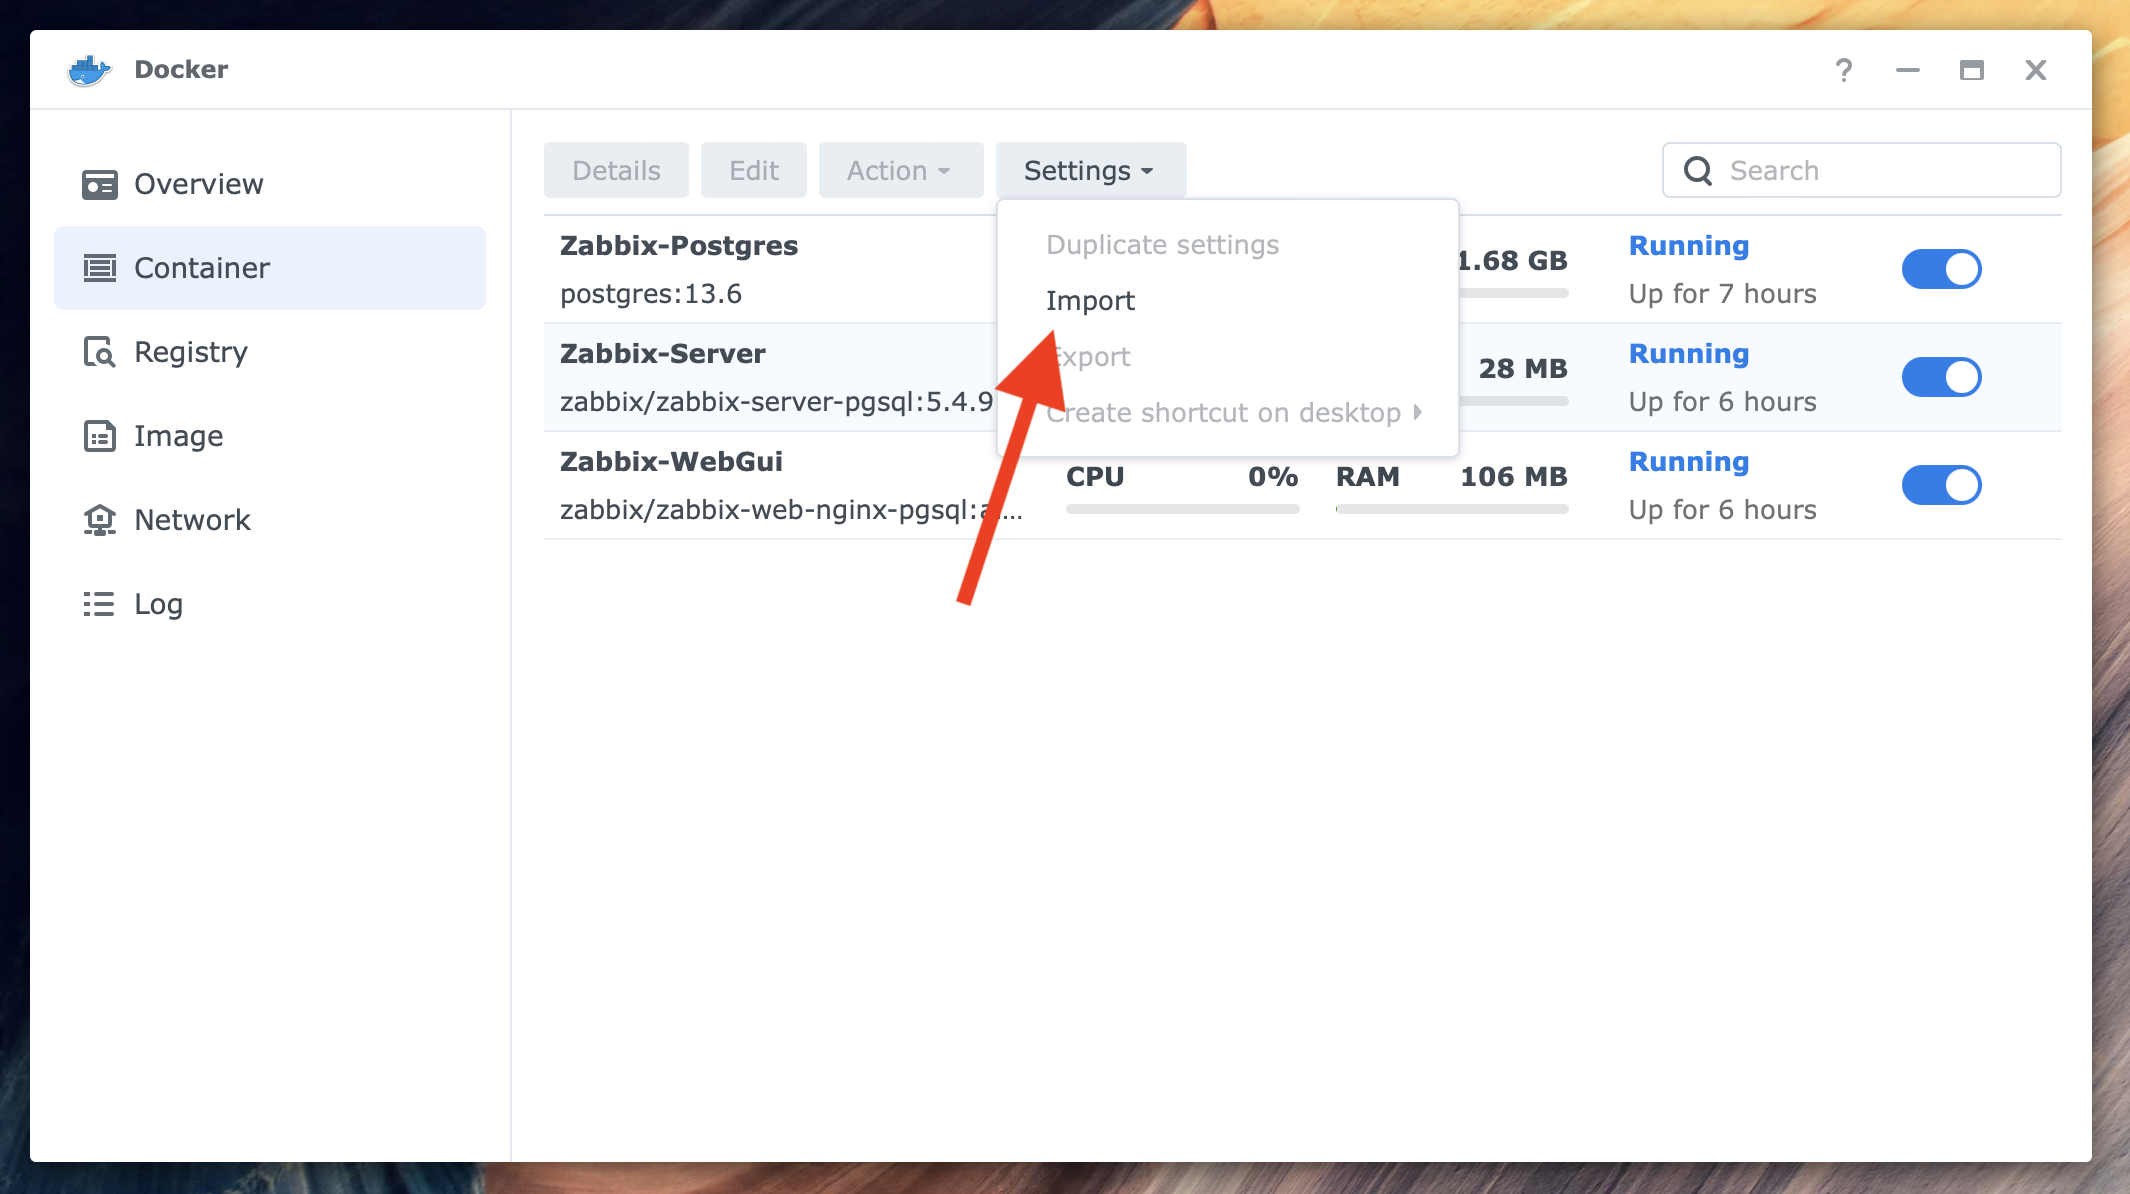
Import Backup Files
Create a new Network with the name: Zabbix-Network
Import the Config Files and make sure, that you use the correct name for the container:
– Zabbix-Postgres
– Zabbix-Server
– Zabbix-WebGui
Hi!
Please add the way to also launch agent container on synology – I don’t know what I’m missing when trying to use it 🙁
Hi, Adrian
Why do you want to add an extra Agent Container. Just add the HOST-Synology with the SNMP Template and you have all information of your device. https://www.zabbix.com/de/integrations/synology
Vielen Dank für diese hervorragende Beschreibung! Die Installation hat damit reibungslos geklappt.
Die Web-Oberfläche sagt mir aber, dass der Zabbix-server nicht verfügbar ist („Get value from agent failed“). Deshalb frage ich mich: sollte ich in Docker auch den zabbix-agent installieren? Gibt es dazu auch eine Anleitung?
Jedenfalls – vielen Dank und viele Grüße!
Hi Matthias,
Danke für das Feedback 🙂 Freut mich zu hören.
Läuft der Zabbix-Server garnicht oder schreibt er dir nur den Fehler?
Ich hab mir nicht die Arbeit gemacht und den zabbix-agent auf der Synology in Docker installiert, da ich via SNMP die Synology überwache … das hat mir gereicht.
Viele liebe Grüße!
BIG tnx!
Hi Valentin,
ich hab noch den agent2 in einem Container installiert. Damit will ich SSL Zertifikate überwachen.
Der Zabbix Server will aber den Agent2 Container nicht erreichen.
Alle Container auf dem gleichen DS1823 NAS (DSM 7).
Wie bekomme ich den Server dazu, den agent2 zu erreichen?
Hi,
ich hab mir den Agent2 noch garnicht angeschaut -> vielleicht komme ich in den nächsten Monaten dazu. 😉
Prinzipiell müsstest du unter Docker entweder das gleiche Netzwerk in den Container aktiveren, dann erreichen sich diese ohne Probleme. Ich denke, dass ist der leichterste weg.
Hi,
postgres 13.6 is not to download in container manager of synology, that is i cannot find it only postgres without version. When i download the unknown version and start import of your file postgress there is an error: „there is no postgres version 13.1“.
How can i solve this?
And another thing that is not so clear to me is must above be configured and when that is done import the files or are those settings in the json files?
Hi,
Have you followed my instruction? You should be able to choose the version you want to download in the Container Menu. I checked it today an the 13.6 is still available.
all the best
Valentin
Hey !
Thank you very much for your work, it’s nicely working.
Two questions.
Is there any chance to use a more recent Zabbix version ? They are at 7.x already, and the problem is that the SNMP template I want to use requires minimum zabbix v6.2.
What would be the way to configure the network to have the container an IP address which is easily fitting into your main subnet ? I have a pi-hole container running with a macvlan solution but that config was very very specific to that, not sure how to apply to this scenario.
Thank you for the great guide.
To help to the others in 2024 the procedure is working with the latest level of Zabbix Server and Zabbix Nginx as well, using Postgres 13.6
I’ve decided to use a MacVlan since I’m monitoring remote devices so it would have been difficult to route back everywhere to the isolated network, but it’s also working nicely.
Again thx, for the great guidance.